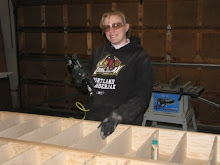
At this point, I should have found something small to practice using my tools with. Something simple.......yeah, not really the way I end up doing these projects. I went big and complicated next. Hee hee.
My husband and I are avid readers. We tend to have a LOT of books on our nightstands. I also have a pet peeve for having my clock below eye level when in bed. No matter where we had looked in the stores, we couldn’t find nightstands we liked. So we drew up what we would like in a dream nightstand. Basically we wanted larger drawers to hold books, a small drawer at the top for hair-ties, remotes etc. I had just bought myself a nice laptop and I voted for a laptop drawer so I could have a place to store my laptop. (I primarily used my laptop in bed and still do. I am not a desk kind of girl at home.) Lastly I wanted them to be tall enough that even with our taller bed, I could have my clock slightly above my eye level.
And so I drew up some plans. We decided on two 12” tall drawers for our books, one 6” drawer at the top and a 3-5 inch drawer for the laptop. I have to dig through my stuff to get my exact measurements out again. I can’t remember how we decided how deep to make it though. Pretty much laid in bed and measured out to where it seemed one should end.
I started with the same basic square with one support piece in the middle going across as I did with the bookshelf. For the top I added a nice large piece of pine and used the router on the edges to give it a nice look on top.
I looked up instructions on how to build a drawer online. For simplicity (and no guts to learn new stuff) I used butt joints again. I used ¾ inch wood for the front and back and ½ inch wood for the sides and ¼ inch stock for the bottom of the drawers. After a few tries I was able to get all the drawer sliders screwed in at the right height. Once all installed I cut some pieces for the drawer fronts. This was the hardest thing for me. I am still not sure the best way to do this so they end up lining up properly in the finished piece. Much like everything else I am sure its just practice until I learn some tricks for it. They don’t line up perfectly, but they work which is important. I added some hardware to the drawers and stained it to match our bed. Added some poly and I was done.
I want to rebuild mine. My husband seems to have taken good care of his, but my laptop drawer front has fallen off and I must have not made it perfectly square because the drawers are catching instead of sliding smooth as they did when I first built it. Still so much to learn, but they still function quite well. I would also like to sand it down and stain it a different color, fix the routered edges and seal with a lacquer or shellac for a smoother surface. I have learned so much more about everything which makes me want to redo nearly all parts of the nightstand. I love it, but I just wish I had built it knowing what I know now and not what I did then. I want to make better drawers too using box joints and dados etc. Everything functions on it as we wanted, I just want it perfect. Robert likes his just the way it is so I have not jumped to rebuild since he seems so happy with his. He doesn’t see the mistakes and just loves it since I built it. Sucker! Hee hee


The one on YOUR side of the bed may be flawed a little but MINE is perfect!
ReplyDeleteA laptop drawer!!! Ingenius! I love it!!! I've never seen one of those in furniture before- AWESOME. ~ Tasha :)
ReplyDelete